
Shopify Meta Conversions API: Step-by-Step Setup Guide (2026)

The Meta Conversions API is the fix for Facebook and Instagram ads that "lose" sales. Browser pixels miss purchases because of ad blockers, Safari limits and declined cookies. On Shopify, you can add server-side Meta tracking in about 30 minutes, without code. This guide is the setup and test process I use on client stores.
By Omar Faruk, Shopify tracking developer · Last updated: October 31, 2026
Quick answer: To set up the Shopify Meta Conversions API, install the Facebook & Instagram by Meta app, connect your pixel, and turn on customer data sharing at the Maximum level. Shopify then sends events from its servers alongside the Meta Pixel. Verify a single, deduplicated Purchase in Meta Events Manager.
Table of contents
- What is the Meta Conversions API?
- Meta Pixel vs Conversions API
- Which data sharing level should you choose?
- Which events does Shopify send to Meta?
- How to set up the Shopify Meta Conversions API (step by step)
- How does Meta deduplicate Pixel and CAPI events?
- How to improve Event Match Quality
- How to verify tracking is working
- Troubleshooting Meta tracking on Shopify
- Keep your catalog and pixel in sync
- When to use an app or server-side GTM instead
What is the Meta Conversions API?
The Meta Conversions API (often called CAPI) sends store events straight from a server to Meta. The Meta Pixel sends events from the shopper's browser. CAPI sends a server copy that browsers cannot block.
Meta uses these events to report results, optimize delivery toward buyers and build audiences. Better event data usually means Meta can find more buyers for the same budget. That is why I treat CAPI as a standard part of every Shopify store running Meta ads.
Meta Pixel vs Conversions API
| Feature | Meta Pixel | Conversions API |
|---|---|---|
| Runs in | Shopper's browser | Shopify's servers |
| Blocked by ad blockers | Often | No |
| Affected by Safari and iOS limits | Yes | Much less |
| Sends fbp/fbc browser cookies | Yes | Only if passed along |
| Customer data for matching | Limited | Hashed email, phone, name, location |
| Shopify setup | Any data sharing level | Enhanced or Maximum level |
The answer is not "pixel or CAPI." You want both, so Meta gets browser signals and reliable server data for each purchase.
Which data sharing level should you choose?
Shopify's Facebook & Instagram app has three customer data sharing levels.
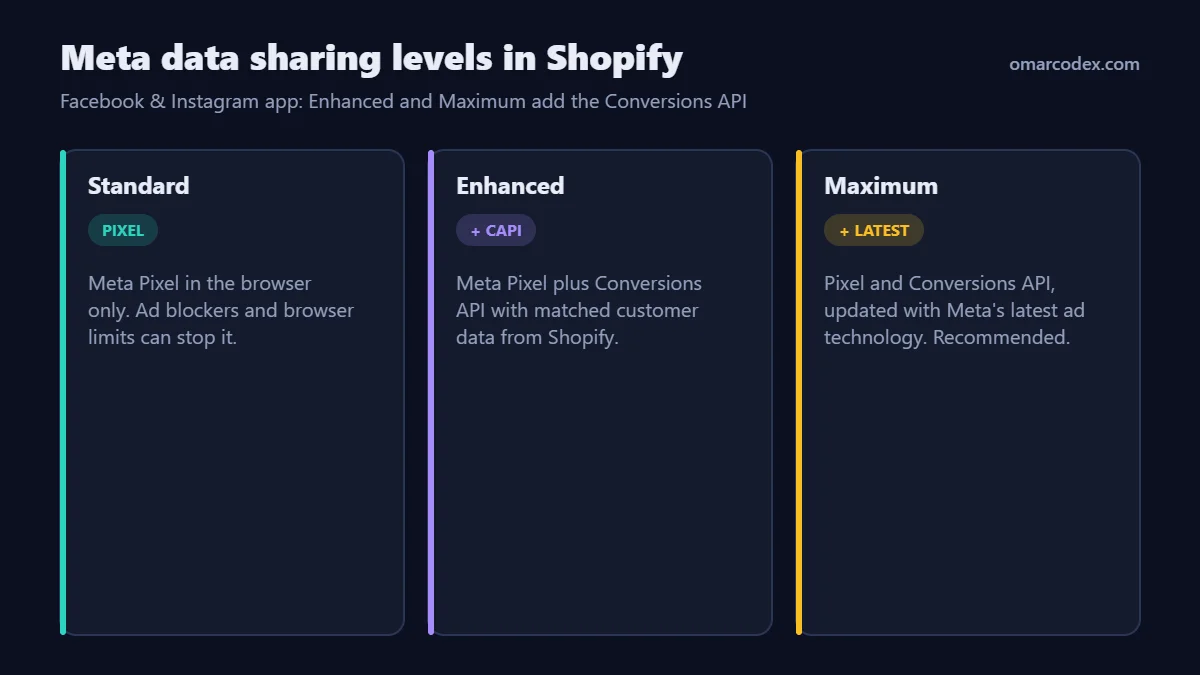
- Standard: Meta Pixel only. Browser ad blockers can stop it.
- Enhanced: Meta Pixel plus the Conversions API, with customer details shared for matching.
- Maximum: Pixel and Conversions API, updated with Meta's latest advertising technology.
I choose Maximum for almost every store. Then I make sure the store's privacy policy explains the data sharing, as Shopify and Meta both require.
Which events does Shopify send to Meta?
Once a pixel is connected, Shopify tracks these standard events automatically. You do not need theme code for any of them.
| Meta event | When it fires on Shopify | What it powers |
|---|---|---|
| PageView | Any page view | Website audiences |
| ViewContent | Product page view | Dynamic product ads, retargeting |
| Search | Storefront search | Intent audiences |
| AddToCart | Product added to cart | Cart abandonment ads |
| InitiateCheckout | Checkout button clicked | Checkout abandonment ads |
| AddPaymentInfo | Payment details entered | Late-funnel analysis |
| Purchase | Thank you page viewed | Sales optimization, ROAS |
Shopify sends the order's total price as the Purchase value. That total includes taxes, duties and discounts. Keep this in mind when you set ROAS targets, since tax inflates the number slightly compared with net revenue.
How to set up the Shopify Meta Conversions API (step by step)
You need Shopify admin access and admin access to your Meta business portfolio, ad account and pixel.
Step 1: Install Facebook & Instagram by Meta
- In Shopify admin, open the Shopify App Store and add Facebook & Instagram by Meta.
- Log in with Facebook and connect your business portfolio, ad account and Facebook Page.
- Accept Meta's terms when asked.
Step 2: Connect your Meta Pixel
- Go to Sales channels → Facebook & Instagram → Settings → Data sharing settings.
- Connect the pixel (dataset) your ads already use. Keeping the same pixel keeps your audiences and learning history.
Step 3: Turn on data sharing at Maximum
- In the Customer data sharing section, turn data sharing on.
- Under Choose level, select Maximum and save.
Step 4: Remove duplicate Meta tracking
- Search
theme.liquidforfbq(andconnect.facebook.net. - Check Settings → Customer events for custom pixels sending Meta events.
- Pause Meta tracking in other pixel apps unless you deliberately chose that app instead.
Step 5: Set up consent
Turn on Shopify's customer privacy banner or a consent app built on Shopify's Customer Privacy API. Several US states give shoppers the right to opt out of targeted advertising. Shopify passes consent choices to its marketing integrations.
Step 6: Check your ad account settings
In Ads Manager, make sure your sales campaigns optimize for Purchase on the connected pixel. Check the attribution setting too. Meta's default is 7-day click and 1-day view.
How does Meta deduplicate Pixel and CAPI events?
Deduplication is how Meta avoids counting one purchase twice when both pixel and server report it. Meta matches events that share the same event_name and event_id within a short time window. It keeps one and combines the useful data.
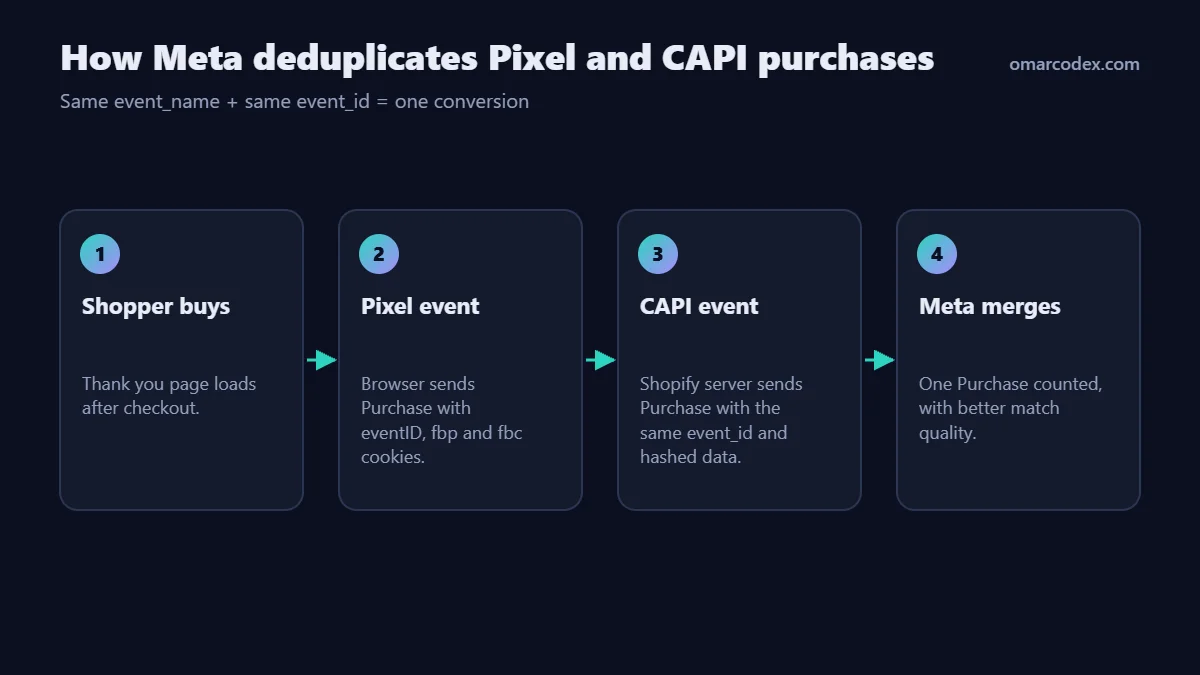
Shopify's app handles this for you. Problems start when you add a second integration. If a GTM tag or another app sends its own Purchase with a different ID, Meta sees two separate purchases.
How to improve Event Match Quality
Event Match Quality (EMQ) is Meta's score from 0 to 10 for how well your events match Meta accounts. You can see it per event in Events Manager. Higher match quality helps attribution and optimization.
| Customer parameter | Impact on matching | How Shopify gets it |
|---|---|---|
| Email (hashed) | Very high | Checkout contact field |
| Phone (hashed) | High | Checkout or shipping phone |
| First and last name | Medium | Shipping or billing address |
| City, state, ZIP, country | Medium | Shipping address |
| fbp and fbc cookies | High for ad clicks | Meta Pixel in the browser |
| IP address and user agent | Medium | Browser and server request |
Practical ways to raise EMQ on Shopify:
- Use Enhanced or Maximum data sharing, never Standard.
- Ask for phone numbers at checkout if it fits your store.
- Keep the pixel running so click IDs reach Meta.
- Do not strip
fbclidfrom landing page URLs with redirects or link shorteners.
How to verify tracking is working
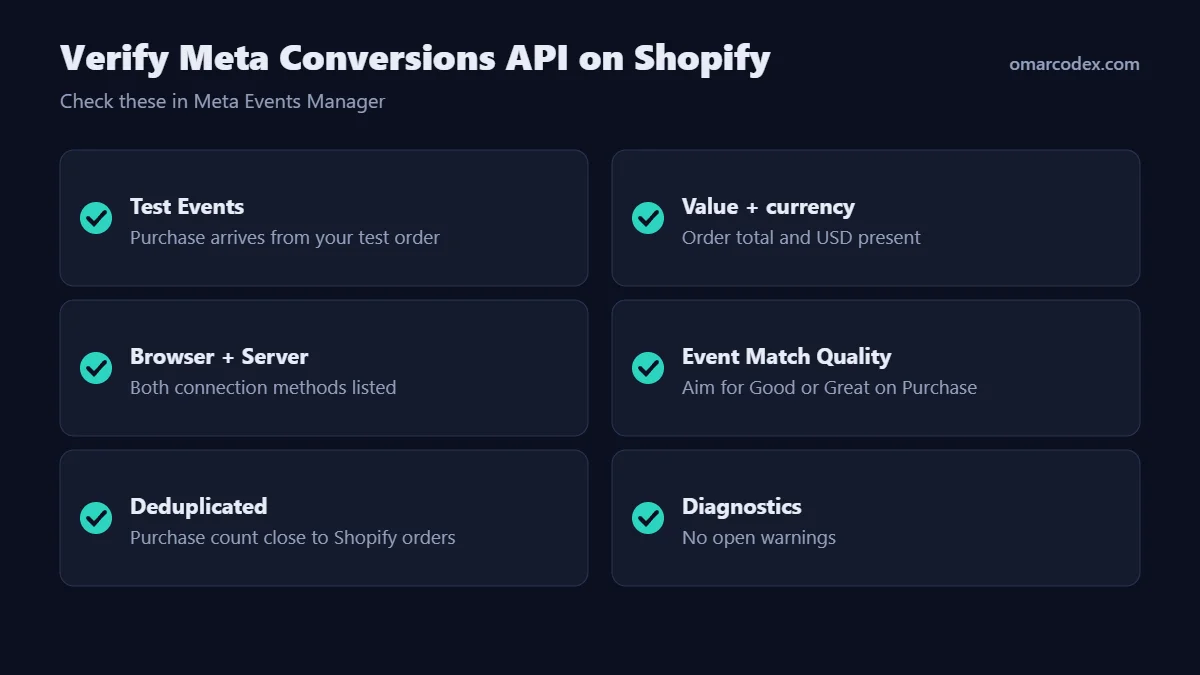
- Test Events: in Meta Events Manager, open your dataset and go to Test events. Open your store from there and place a test order with a 100% discount code.
- One Purchase only: confirm a single Purchase with the right value and currency.
- Both connection methods: in the event overview, Purchase should show browser and server activity.
- Deduplication: after 24–48 hours, compare Meta's Purchase events with Shopify orders. They should be close, not doubled.
- Event Match Quality: check the Purchase score and the parameters Meta suggests adding.
- Diagnostics: fix open warnings such as missing parameters or duplicate events.
The Meta Pixel Helper Chrome extension is also useful. It shows browser events on each page, but it cannot show server events.
Troubleshooting Meta tracking on Shopify
| Problem | Likely cause | Fix |
|---|---|---|
| Purchases doubled | Theme code or second app also sends Purchase | Keep the Facebook & Instagram app as the only source |
| No server events | Data sharing set to Standard | Switch to Enhanced or Maximum |
| Wrong pixel receives data | Old pixel connected in the app | Reconnect the pixel your campaigns use |
| Purchase value looks high | Shopify sends the order total including tax and shipping | Expected; account for it in ROAS targets |
| Low Event Match Quality | Few customer details shared | Use Maximum, collect phone, keep the pixel |
| Purchases far below Shopify | Attribution window, consent, ad-blocked browsers | Compare same windows; confirm CAPI is active |
How to keep your catalog and pixel in sync
If you run Advantage+ catalog ads, Meta must match product IDs in your events to products in your catalog. When the IDs do not match, Meta cannot show the right product to the right shopper.
- Sync your catalog through the same Facebook & Instagram app that sends your events. Then the IDs line up automatically.
- In Commerce Manager, check the catalog's Events or Diagnostics area for the event match rate.
- If you also upload a feed from another tool, make sure it uses the same product and variant ID format.
- Connect the pixel to the catalog in Commerce Manager so retargeting audiences can use it.
A low match rate is a common reason catalog ads underperform even when purchase tracking looks fine. It is worth checking once a month.
When to use an app or server-side GTM instead
The built-in app covers most stores. I move clients to another setup only for clear reasons:
- Multiple pixels for several ad accounts or agencies.
- Custom events such as quiz completions or subscription renewals.
- Profit-based values instead of revenue.
- One pipeline feeding Meta, TikTok, Google Ads and GA4 together.
For that last case, read my guide to Shopify server-side tracking. It compares server-side GTM and tracking apps in detail.
Related guides in this series
- Shopify conversion tracking overview for GA4, Meta and TikTok
- TikTok conversion tracking on Shopify with Pixel and Events API
- Shopify GA4 conversion tracking setup
Official references: Shopify Help Center: Facebook data sharing, Meta for Developers: Conversions API and Meta for Developers: Deduplicating pixel and server events.
Conclusion
A solid Shopify Meta Conversions API setup is mostly about discipline. Use the Facebook & Instagram app at Maximum data sharing, keep one source for Purchase, and test every change in Events Manager. Clean data lets Meta's algorithm spend your budget on real buyers.
Need a second pair of eyes on your Meta tracking? Take a look at my Shopify tracking service or contact me for a tracking audit.
About the author: Omar Faruk is a web developer who builds and fixes Shopify, WordPress and Laravel sites. He specializes in GA4, Meta, TikTok and Google Ads conversion tracking and Merchant Center fixes.
Written by Omar Faruk
Full-Stack Developer — WordPress, Laravel & Shopify
I'm a full-stack web developer who has shipped news portals, company sites, multi-user web apps and Shopify stores for clients around the world. I care about clean code, fast pages and websites that actually bring in sales.
Need help with this on your site?
I can set it up for you — quick turnaround, fixed price.


